
Team Arbot, winners of Quack Hack 2014, took a very 21st century approach to minimise the disconnect with remote staff. They created a robot that can be controlled from anywhere in the world using a built-in camera and web interface.
Bringing the Team Together
Our fantastic IT Manager works remotely from India. This arrangement serves us well but things could run even more smoothly if only he had a closer look at what is happening in our Elstree office. Team Arbot — Gareth, Benjamin, Sylvain and myself — decided to meet him halfway (as the Internet is halfway to anywhere!) by giving him a second set of eyes and a first set of wheels.
The week before the hackathon, our team got together to discuss how we could give Arpit better access to the physical workspace without relying on other staff. After a brainstorming session, we agreed to create a robot and aim for these basic functions:
-
- Controlling a robot’s movement from a web interface
- Outputting sounds from the robot using key actions
- Displaying a live video feed to the person controlling the robot
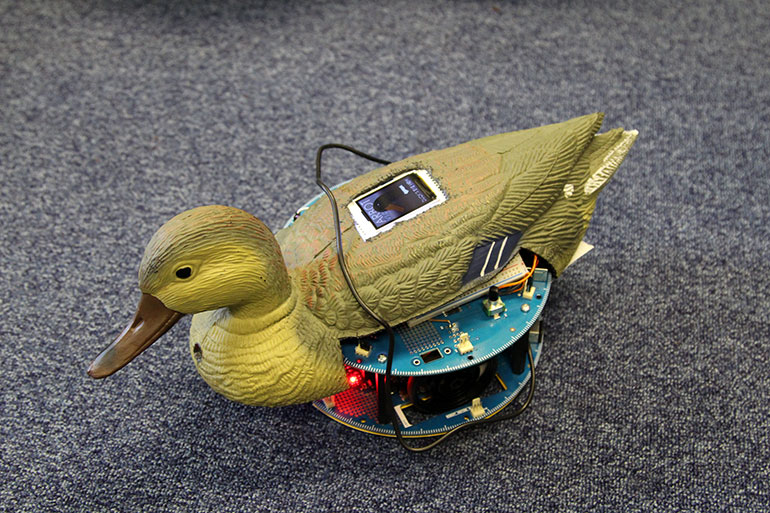
Arbot's first test drive, before the cords were tucked away
Bringing the Components Together
We decided to build on the Arduino Robot, a programmable and open-source platform for physical technology. We also incorporated a Spark.io core and an independently powered Raspberry Pi with camera module.
The user interface was created as an AngularJS web app. The page displays a live video feed from the Raspberry Pi and allows a user to input movement commands for the robot either using on-screen buttons or the keyboard’s directional keys. These commands are sent to the wifi-enabled Spark.io core, which in turn passes them to the Arduino control board (the Arduino itself isn’t wifi-ready). While our chosen components gave us a helpful head start, they faced a degree of difficulty getting them all to work together.
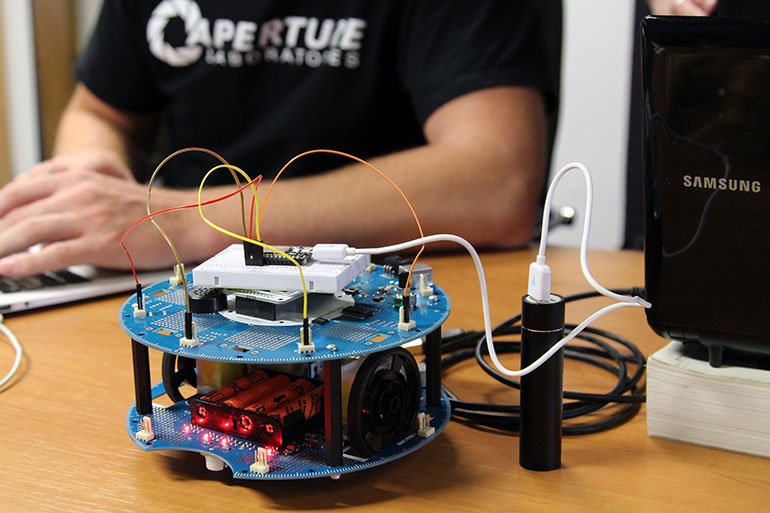
The early stages of Arbot as an Arduino Robot, Spark.io core and Anker battery.
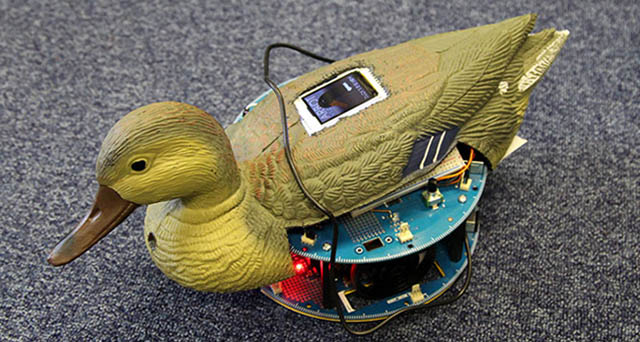
Once everything was finally programmed, coordinated and functioning properly, we needed a shell to house the electronics. After considering all the plush and rubber ducks Amazon has to offer, the Arbot took shape as a realistic mallard decoy. After the finishing touches of mounting the camera in the duck’s chest and adding an LCD display to its back, the Arbot was ready to roll.
We took advantage of some extra time before the keyboards-down deadline to integrate a queueing system based around the Twitter API and implement a user time limit on the web interface. This will allow the controls to be turned over to the public. Soon anybody online will be able to roam the Cyber-Duck office from a dedicated page on our company website.
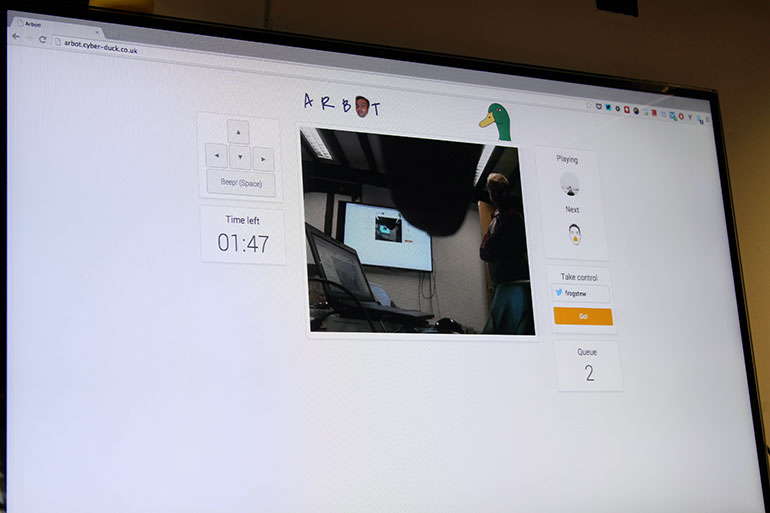
Arbot's web interface allows for a duck's eye view of Cyber-Duck HQ
Audio Upgrade & Product Design
The Arduino Robot is limited in terms of audio; it can only read a very specific type of 8-bit file. We aim investigate a way of upgrading the Arbot’s sound output from a simple beep to a “quack” WAV with a more accommodating library or an additional piece of hardware. Different hardware could also allow a user to converse with staff in the office using a computer microphone and a microphone onboard the robot.
As the Arbot was (literally!) hacked together using a saw, we aim to source a product designer to create a cleaner, more modern shell for the robot and its components. This design overhaul would include moving the camera from the chest to the eye, to provide users with a true duck’s eye view.
